前提条件
Gmailのアカウントを持っていること。
Google Cloudの設定
https://console.cloud.google.com/にアクセスして、プロジェクトを作成する。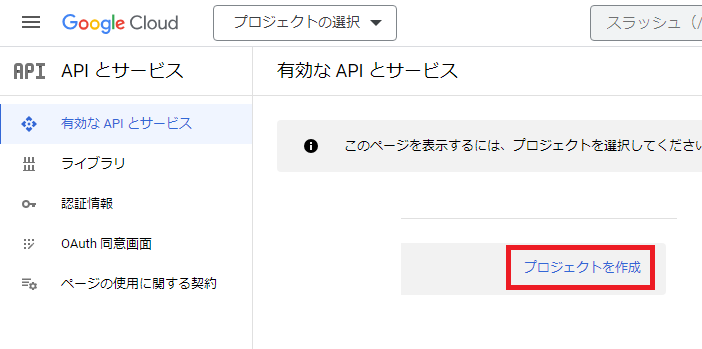
わかりやすい名前を付ける。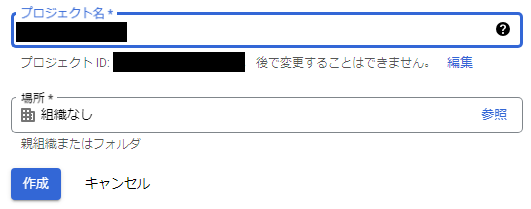
User Typeは「外部」を選択する。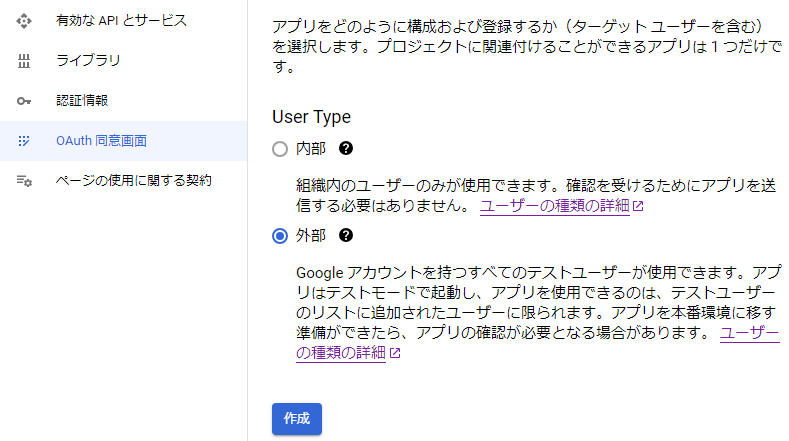
テスト用なのでアプリ情報は適当に入力する。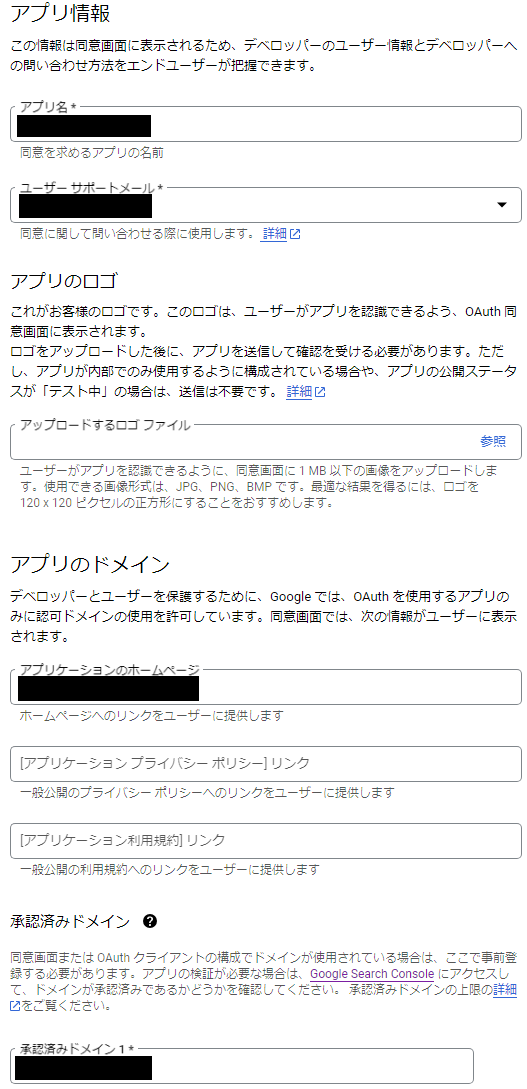
プロジェクトを作成したら、「認証情報」タブの「認証情報を作成」をクリックする。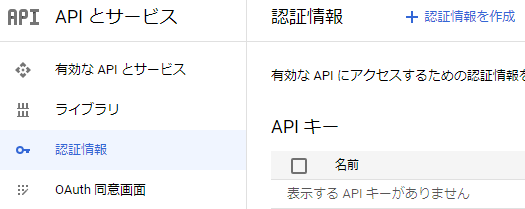
「OAuthクライアントID」を選択する。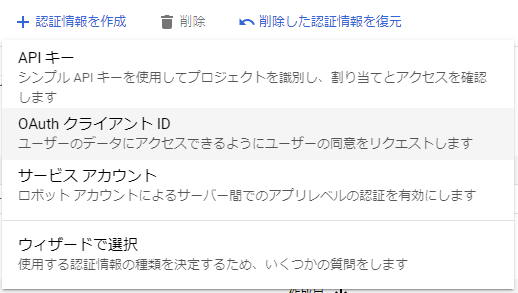
アプリケーションの種類には「デスクトップアプリ」を選択する。メールを送信するだけなので、ライブラリからGmail APIを追加する必要はない。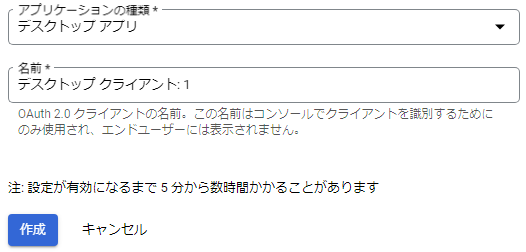
作成が完了したら、クライアント ID、クライアント シークレットが発行されるので、メモしておく。
プログラムの例
build.gradle
plugins {
	id 'java'
}

group = 'oauth2gmail'
version = '0.0.1-SNAPSHOT'

java {
	sourceCompatibility = '17'
}

configurations {
	compileOnly {
		extendsFrom annotationProcessor
	}
}

repositories {
	mavenCentral()
}

dependencies {
    implementation 'com.google.api-client:google-api-client:2.2.0'
    implementation 'com.sun.mail:jakarta.mail:2.0.1'
}

tasks.named('test') {
	useJUnitPlatform()
}
GmailOAuth.java
メモしておいたクライアント ID、クライアント シークレットを、CLIENT_ID、CLIENT_SECRET変数にそれぞれ設定する。
今回リダイレクト処理は必要ないので、リダイレクトURLにはurn:ietf:wg:oauth:2.0:oobを設定する。これを設定するとリダイレクトせずに直接画面に認証コードが表示される。
MAIL_FROMにGmailのアドレスを設定する。MAIL_TOにはテストメールを送っても大丈夫なメールアドレスを設定する。
public class GmailOAuth {

    private static final String SCOPE = "https://mail.google.com/";
    private static final String CLIENT_ID = "CLIENT_ID";
    private static final String CLIENT_SECRET = "CLIENT_SECRET";
    private static final String REDIRECT_URI = "urn:ietf:wg:oauth:2.0:oob";
    private static final String MAIL_FROM = "sender@foo.bar";
    private static final String MAIL_TO = "receiver@foo.bar";

    public static void main(String[] args) throws IOException, MessagingException {
        // 取得した認証コードを保存するフォルダを指定
        var fileDataStoreFactory = new FileDataStoreFactory(new File(System.getProperty("java.io.tmpdir")));

        // OAuth 2.0 の認証フローを作成
        var flow = new GoogleAuthorizationCodeFlow.Builder(new NetHttpTransport(),
                GsonFactory.getDefaultInstance(), CLIENT_ID, CLIENT_SECRET, Set.of(SCOPE))
                        .setCredentialDataStore(StoredCredential.getDefaultDataStore(fileDataStoreFactory)).build();

        // アクセス トークンを取得
        var credential = flow.loadCredential("user");

        // 取得済みの認証情報があるか、またそれは有効か確認
        if (credential == null || (credential.getExpiresInSeconds() < 100 && !credential.refreshToken())) {
            // 有効なコードがなかった場合、新たに認可コードを取得
            var url = flow.newAuthorizationUrl().setRedirectUri(REDIRECT_URI).build();
            System.out.println("Please open the following URL in your browser then type the authorization code:");
            System.out.println("  " + url);
            System.out.println("Please enter your authentication code:");

            try (var s = new Scanner(System.in)) {
                var code = s.nextLine();
                var tokenResponse = flow.newTokenRequest(code).setRedirectUri(REDIRECT_URI).execute();
                credential = flow.createAndStoreCredential(tokenResponse, "user");
            }
        }

        // SMTP セッションを作成
        var props = new Properties();
        props.put("mail.smtp.host", "smtp.gmail.com");
        props.put("mail.smtp.port", "587");
        props.put("mail.smtp.auth", "true");
        props.put("mail.smtp.auth.mechanisms", "XOAUTH2");
        props.put("mail.smtp.starttls.enable", "true");
        var session = Session.getDefaultInstance(props);

        // メールを作成
        var message = new MimeMessage(session);
        message.setFrom(new InternetAddress(MAIL_FROM));
        message.setRecipient(Message.RecipientType.TO, new InternetAddress(MAIL_TO));
        message.setSubject("Gmail から送信したメール");
        message.setText("このメールは、Gmail の SMTP で OAuth 2.0 認証を使って送信しました。");

        // メールを送信
        var transport = session.getTransport("smtp");
        transport.connect(MAIL_FROM, credential.getAccessToken());
        transport.sendMessage(message, message.getAllRecipients());
        transport.close();

        System.out.println("メールを送信しました。");
    }
}
実行
初回実行時、下記のメッセージが表示されるようになっている。表示されているURLにブラウザでアクセスし、アクセス権を付与する。
Please open the following URL in your browser then type the authorization code:
  ここに表示されるURLにブラウザでアクセスする
Please enter your authentication code:
ChromeブラウザでGmailにログイン済みの状態であれば、下記の通りアカウントの選択に表示される。もちろん別のアカウントを選択しても良い。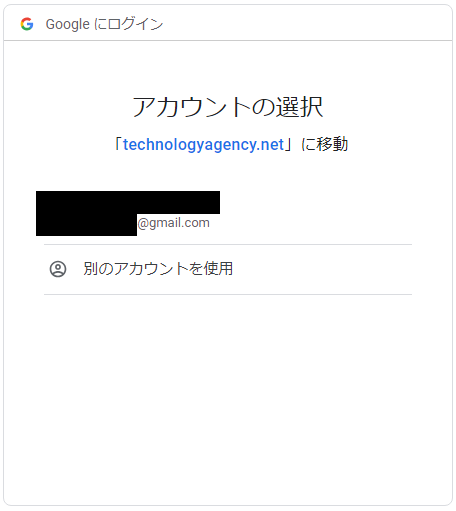
テスト用のプロジェクトのため、注意事項が表示されるがそのまま続行する。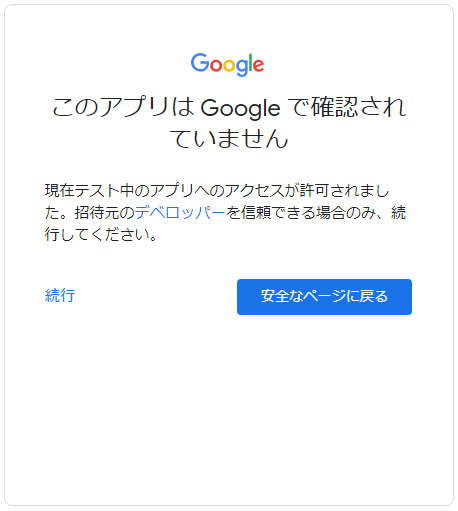
アクセス権の付与が間違いないことを確認して、続行する。
表示された認証コードをコピーして、「Please enter your authentication code:」の下に貼り付けEnterを押下する。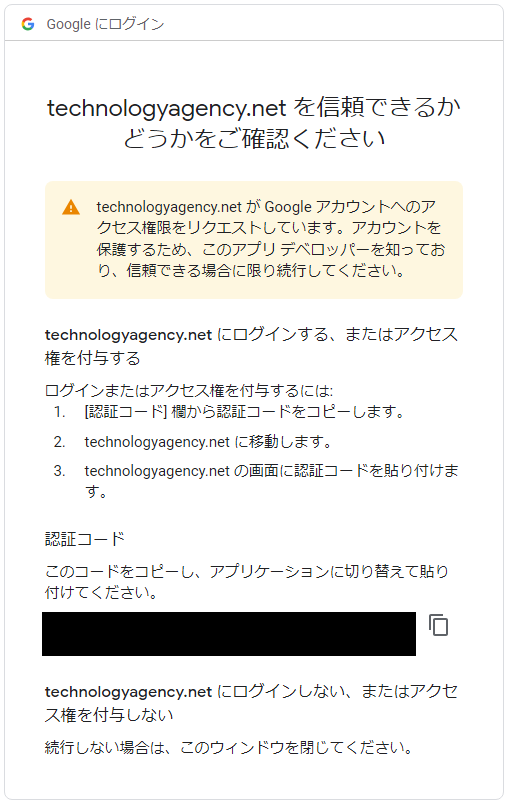
「メールを送信しました。」と表示されたら、送信先のメールアドレスにメールが送信されたことを確認する。
2回目以降は、認証コードの有効期限内であれば、上記の手順無しでメール送信できる。逆にもう一度最初から実行したい場合は、「System.getProperty(“java.io.tmpdir”)」フォルダ内の「StoredCredential」というファイルを削除する。